

“The emails that LearnDash sends out are going to spam!”
This is one of the most common issues we see from people who run LearnDash courses. It can be a frustrating issue that leads to an influx of support queries or a lack of trust from your customers.
More often than not, this issue isn’t actually related to LearnDash at all. It’s related to your web hosting and the way it is configured to send emails. Thankfully it’s something that can be easily remedied.
In this blog we’re going to guide you through the process of setting up your LearnDash site with a service called Mailgun to boost your email deliverability and help stop those pesky emails from going AWOL.
Mailgun is an inexpensive service that is specifically designed for sending system-related emails. And to give a sense of what I mean by inexpensive, at the time of writing you get over 1000 emails each month for free and pricing starts at just $0.80 per 1000 emails beyond that.
Mailgun is well trusted by all of the major email service providers, such as Gmail, Hotmail, Office365 etc. and can easily handle large volumes of emails if you need it to.
To carry out the steps below you’ll need:
- Access to your domain registrar (Godaddy, 123reg etc.)
- A WordPress account with the ability to install plugins
Ready to get started? Let’s go!
Step 1
Head to Mailgun and create an account by clicking on the “Get Started” button in the top right.
The registration form asks you to enter some credit card details when you sign up, but it’s important to note that you will only ever be charged if you exceed a certain number of emails each month. This is a pretty high number, and by the time you exceed it your LearnDash site will be quite popular and any spend will probably be easily justified.
You should choose the “Flex Trial” plan if you’re just getting started. This will be a great fit for a standard LearnDash site – unless you’re planning on sending out emails in the hundreds of thousands per month.
Step 2
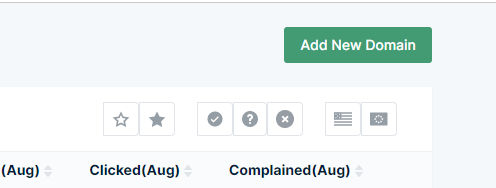
Once your account is created and you’ve logged in, head to Sending -> Domain settings, then click on Add New Domain:
Step 3
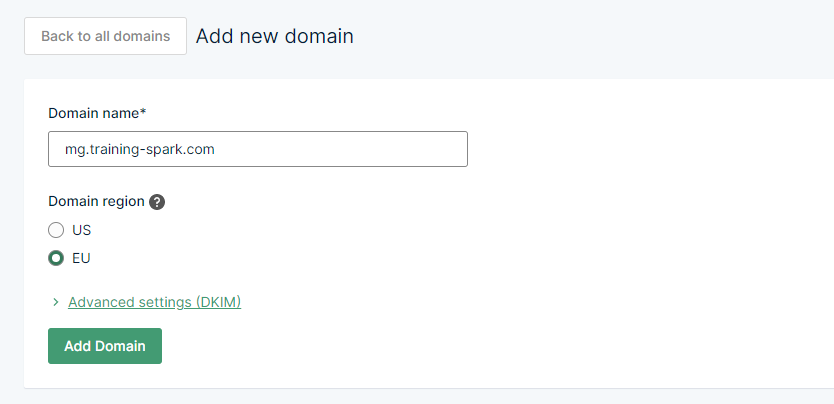
Mailgun’s advice here is to use what’s called a subdomain (something.<yourcompany>.com) dedicated to sending out email. So in the domain name field, add mg.<yourcompany>.com.
Then set the domain region to be wherever you want your emails to be sent from. Typically the area closest to you. The Advanced settings can be ignored and you can click on “Add Domain”:
Step 4
Now you need to head to your domain’s registrar (Godaddy, 123reg etc.) and log in. You’ll need to add some information here that links your domain to Mailgun and allow it to send emails on behalf of your company.
If you’re not familiar with these things, it would be best to seek the guidance of a web developer. Your domain’s settings aren’t an area you want to go poking around in without some idea of what you’re doing!
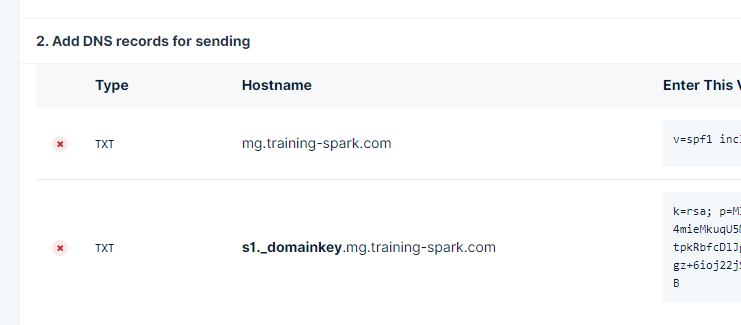
Within your domain registrar, find your domain and look out for somewhere you can set your DNS records. This will be different on each registrar, but all registrars should give you some control over this.
Mailgun lists a handful of records that you need to add here, so carefully add each one as described. There are some instructions at the top of the page to help with some of the main domain providers:
Step 5
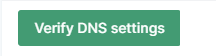
Once added, you’ll now need to wait a short while. At best this will be 5-10 minutes but this can take several hours depending on the domain registrar. To check if everything is ready, click on the “Verify my DNS settings” button:
Step 6
Once everything is good to go, you should receive an email from Mailgun to confirm.
Once you get this, Mailgun is ready to send emails from your LearnDash system. All we need to do now is link the two systems.
Within Mailgun, head to Settings -> API Keys
Here you’ll see a handful of keys (like passwords) that were created when you set up your Mailgun account. Click on the eye next to the “Private API key” and copy this down to somewhere like Notepad (but make sure you delete it afterwards!):

Step 7
Now head over to your WordPress/LearnDash platform and log in using your administrator account.
Step 8
In your WordPress dashboard select Plugins -> Add New then search for a plugin called WP Mail SMTP.

This is a popular plugin that is set up to work with Mailgun and will make the next few steps a breeze.
Install and activate this plugin.
Step 9
Once installed and activated, you’ll see a WP Mail SMTP item in the menu of your dashboard. Head to WP Mail SMTP -> Settings
Step 10
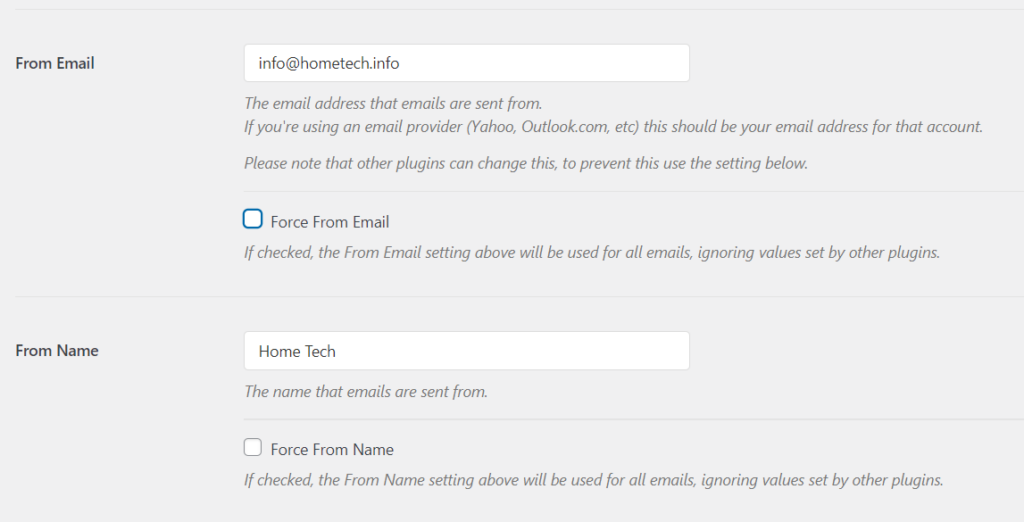
Scroll down on the first tab you see (General settings) and you’ll firstly see options to set the name and email address that you want your system to send emails as. Here’s where you can add your company name and a company related email address:
Step 11
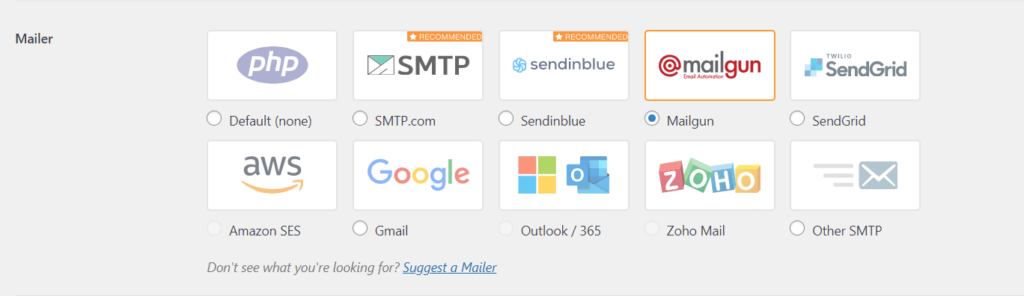
Scroll down a little further and you’ll see the “Mailer” section. From here you’ll see a convenient “Mailgun” option, among a few other popular email services. Choose Mailgun from this list:
Step 12
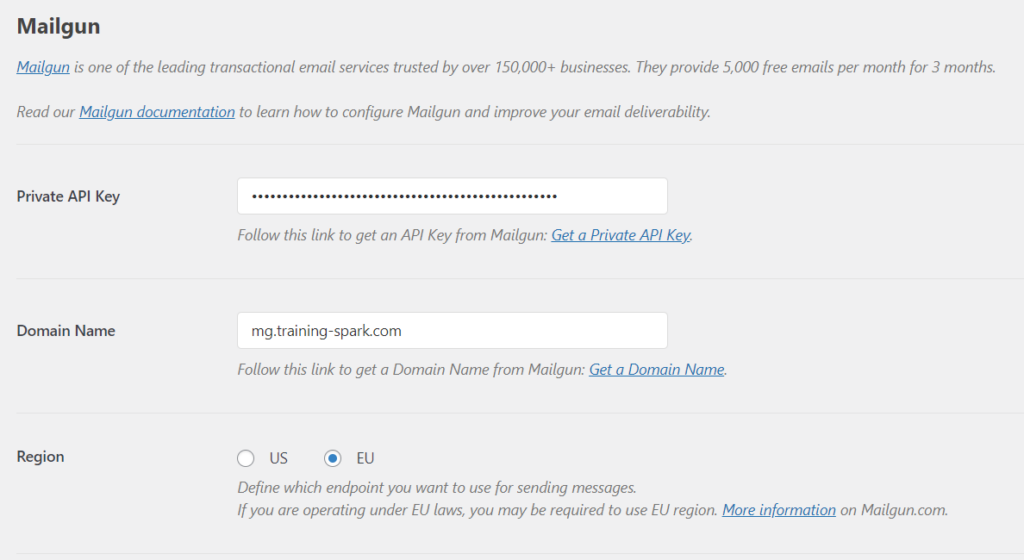
Once selected, this will expand some Mailgun specific options and these are all bits you can add from previous steps.
– In the “Private API Key” field, paste the key you copied in step 6.
– In the “Domain Name” field, enter the domain name you chose in step 3
– In the Region field, select the option that you chose in step 3
Step 13
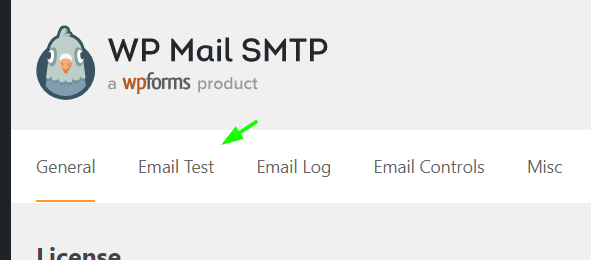
Once added, click “Save Settings” and you’re all set! Your LearnDash site will now send all of its outgoing email via Mailgun and it is much more likely to get to your learners’ inboxes. To give it a quick test, head to the “Email Test” tab at the top of the settings page:
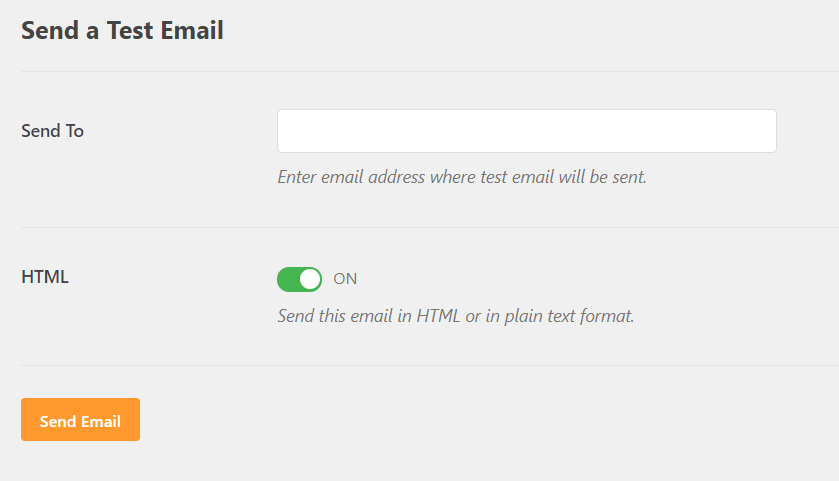
Step 14
From here you can send a test email to any email address, and all being well it will be received without any issues:
If this guide helps you, please give it a share and let us know in the comments below. Now you’ve set up your emails, it’s time to customise emails in LearnDash!

0 Comments